
How to Fix Crumbling Concrete Wall in Miami, FL?
The tropical climate of Miami can take a toll on exterior structures, leading to deterioration over time. In this blog, we will equip you with valuable insights and practical tips on how to effectively repair and restore crumbling concrete walls. Whether you’re a homeowner looking to undertake a DIY project or seeking informed guidance for professional assistance, our guide covers the essential steps and considerations to ensure your property’s structural integrity and aesthetic appeal are preserved. Let’s embark on the journey to revitalize and fortify your concrete walls in the vibrant city of Miami.
Recognizing the Signs
1. Noticeable Cracks
The most evident and urgent sign demanding your attention is the presence of visible cracks in the concrete wall. These cracks, much like wrinkles on an aging face, signify the passage of time and the environmental impact on your property. Identifying and promptly addressing this issue is not merely about structural integrity but also about preserving the visual appeal of your property.
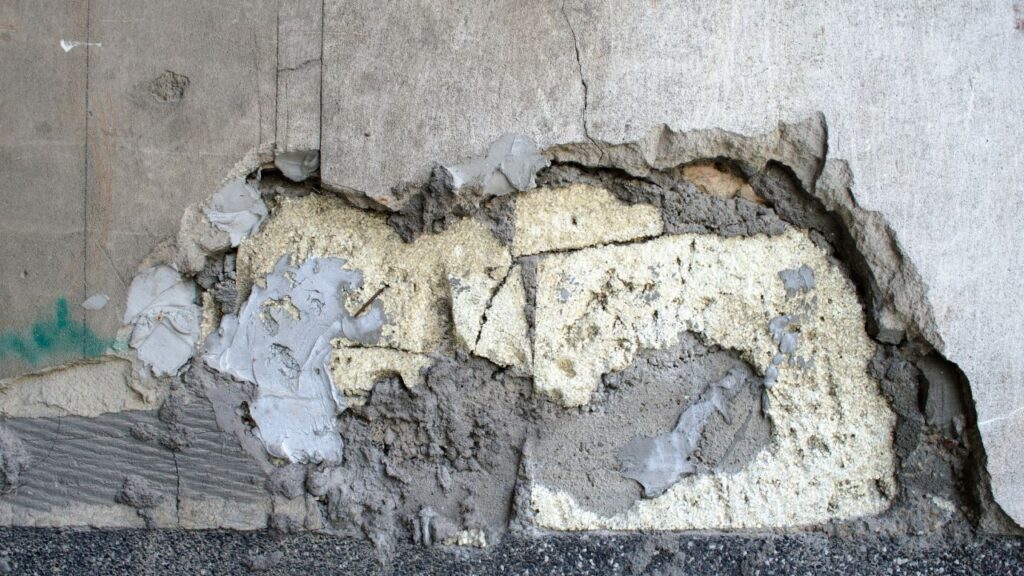
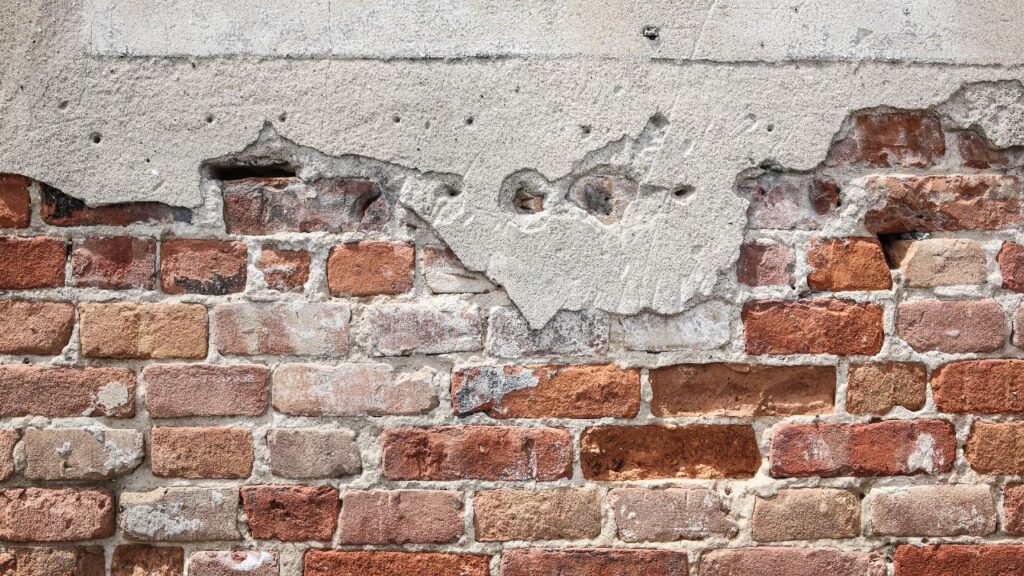
2. Crumbling Concrete
Beyond the visible cracks, the sight of crumbling concrete is another ominous red flag. If you observe disintegration or flaky areas on your wall, it’s akin to the body’s warning signals, indicating that the structural integrity of the concrete has been compromised. Weathering, moisture damage, or the use of subpar construction materials may be culprits in this gradual erosion.
3. Tilted Concrete
A wall that once stood proudly may now subtly lean, signaling underlying structural issues. This tilt could be the outcome of myriad factors, from soil settling to seismic shifts. Addressing this sign promptly is not just about restoring aesthetics; it’s about ensuring the safety and stability of your property.
4. Concrete Below Ground Level
The most alarming sign manifests when the concrete has sunk below ground level. This sinking feeling may result from poor foundational support or gradual soil erosion. In such cases, seeking professional help becomes imperative to assess and rectify the situation before it escalates into a more profound concern.
Essential Supplies for Concrete Wall Repair
Before embarking on the intricate journey of repair, assembling the necessary supplies ensures a seamless restoration. Equip yourself with a comprehensive toolkit that includes:
- A Broom: Clearing the repair site of loose debris becomes the first step in this rejuvenation process.
- A Putty Knife: This versatile tool proves invaluable for delicately removing loose or flaky pieces of concrete, a task requiring precision.
- A Mortar Mixer: The heartbeat of concrete repair, facilitating the preparation of the essential repair mix with the right consistency.
- A Metal Trowel: The artisan’s brush, instrumental in applying mortar to the exposed wall with precision, ensuring a seamless finish.
- Sandpaper: A smoothing maestro, adept at ironing out irregularities or rough spots on the concrete’s surface, contributing to a polished result.
- VO-500 Concrete Mix: The elixir for resilient repairs, a blend designed for lasting durability and structural strength.
- Water: The lifeblood of the repair process, ensuring the concrete mix achieves the perfect consistency for optimal performance.
- Tape Measure: A meticulous partner in maintaining precision throughout the repair journey, ensuring every inch is accounted for.
- Wood or Metal Stakes: Guardians of stability, offering support for the intricate repair work, preventing structural sagging or misalignment.
- A Mason Line: The guide ensuring a straight and level application of materials, a critical aspect of successful repairs, maintaining uniformity.
- A Level: The truth-teller, confirming the evenness of the repaired surface, a testament to a job well done and structural stability.
- Safety Goggles: The shield protecting the eyes from dust and debris, indispensable during the repair, ensuring personal safety.
- Plastic Sheeting or Heavy Plastic Bags: The protective cloak for the repair site, guarding against external elements, especially crucial during unpredictable weather conditions.
- A Power Drill with a Hammer Drill Bit Attachment: The versatile assistant, essential for specific facets of the repair process, enhancing efficiency and precision.
Preparation Steps Before Repair
Clear the Area
Commence the restoration journey by meticulously removing loose dirt, dust, and debris from the repair site using a broom or a gentle stream of water from a garden hose. A clean slate is paramount for the effectiveness of the repair, allowing materials to adhere securely.
Verify Dryness
Essential to the process is ensuring the wall is not just dry but bone dry before commencing the repair. Any lingering moisture can compromise the adhesion and curing of the repair materials. Patience in this phase ensures a solid foundation for the subsequent steps.
Gather Tools
Arm yourself with a bucket of water, a trowel, a high-grit sanding pad, a trowel for taping, a putty knife, and a roller. These tools are your allies, facilitating a smoother and more efficient repair process. Each plays a unique role in bringing the concrete wall back to life, ensuring attention to detail and precision.
Building milestones, one estimate at a time!
Contact us for a FREE estimate with our specialized general contractor.
Concrete Wall Repair Process
Step 1: Surface Cleaning
Start the journey by eliminating loose dirt, dust, or debris with meticulous precision, employing a broom or garden hose. Paying attention to corners and crevices where dirt may accumulate ensures a thorough and effective cleaning, setting the stage for the repair. A clean surface not only aids in adhesion but also provides a clear canvas for the subsequent steps.
Step 2: Epoxy Mortar Application
Mix the VO-500 concrete wall repair mix according to the package instructions. When addressing cracks, the application of mortar to both sides is crucial. Use a trowel or a wet broom to smooth it out, ensuring comprehensive coverage not only of the visible crack but also the surrounding areas. This step is not just about filling gaps; it’s about fortifying the entire structure, creating a unified and resilient surface.
Step 3: Waterproofing Sealant
Apply a high-quality waterproofing sealant to the surface, forming an impervious shield against moisture. This step is particularly crucial in regions with frequent rainfall. The sealant acts as a barrier, preventing water from infiltrating the repaired areas and causing potential harm. Think of it as weatherproofing your property against the elements, ensuring longevity and sustained protection.
Step 4: Paint or Stucco Application
For those aiming not just for restoration but also enhancement, consider the application of paint or stucco over the mortar. This isn’t just a cosmetic touch; it’s an additional layer of defense against the elements. Choose a paint color or stucco texture that harmonizes with your property’s design, enhancing both form and function. This step not only protects but also adds an aesthetic dimension to the repaired wall.
Conclusion
Repairing a crumbling concrete wall is a nuanced process that combines precision and artistry. Armed with the right tools, detailed preparation, and expert guidance, you not only restore the structural integrity of your property but elevate its visual appeal. This comprehensive guide ensures you undertake the journey with confidence, knowing that every step contributes to a lasting transformation that blends aesthetics with functionality.
FAQs
The duration of the repair process varies based on the extent of the damage. Minor repairs may be completed within a day, while extensive damage may necessitate several days for thorough restoration. Timely intervention ensures a swift recovery.
While small repairs may be within the scope of DIY enthusiasts, it is highly recommended to consult professionals for comprehensive assessments and major repairs. Professional expertise ensures long-term structural integrity and addresses underlying issues, preventing future complications.
A waterproofing sealant serves as a protective shield, safeguarding the repaired surface from moisture. This preventative measure not only ensures the longevity of the repair work but also prevents future damage in regions prone to frequent rainfall. It’s an investment in the durability of your property.
Dry and mild weather conditions are preferable for concrete wall repairs. These conditions facilitate better adhesion and curing of repair materials, ensuring a solid and enduring restoration. Avoid initiating repairs during excessively wet or cold weather to achieve optimal results.
Yes, seeking professional evaluation is advisable even for minor cracks. Professionals provide a thorough understanding of underlying issues, preventing potential complications in the future and ensuring a comprehensive and effective repair. It’s a proactive approach to maintaining the structural integrity of your property.